The Art of Crafting a Custom Crispr-Cas9 Paper Model: Unveiling the Answer Key

In recent years, CRISPR-Cas9 has emerged as a revolutionary tool in the field of genetic engineering. As scientists continue to explore the potential of this technology, it has become increasingly important to educate the general public about its basic principles and workings. One effective way to do this is by building a paper model of CRISPR-Cas9, which allows individuals to physically interact with the components and better understand the process.
A paper model of CRISPR-Cas9 provides a visual representation of the molecular machinery involved in gene editing. It helps to illustrate how guide RNA (gRNA) directs the Cas9 enzyme to a specific target DNA sequence, leading to precise modifications. By constructing a paper model, individuals can learn about the various components of CRISPR-Cas9 and how they work together to accomplish gene editing.
Building a paper model of CRISPR-Cas9 can be a fun and educational activity for students, teachers, and anyone interested in learning about genetic engineering. It allows hands-on exploration and helps to simplify complex concepts. Additionally, it can serve as a valuable resource for educators, as they can use the model to demonstrate and explain the process of gene editing in a visual and interactive manner.
What is Crispr-Cas9?
In recent years, Crispr-Cas9 has emerged as a revolutionary tool in the field of genetic engineering. It is a powerful gene-editing technology that allows scientists to precisely modify the DNA of living organisms, including plants, animals, and even humans. Crispr-Cas9 has the potential to revolutionize medicine, agriculture, and biotechnology, offering the possibility to cure genetic diseases, enhance crop yields, and create new treatments for various conditions.
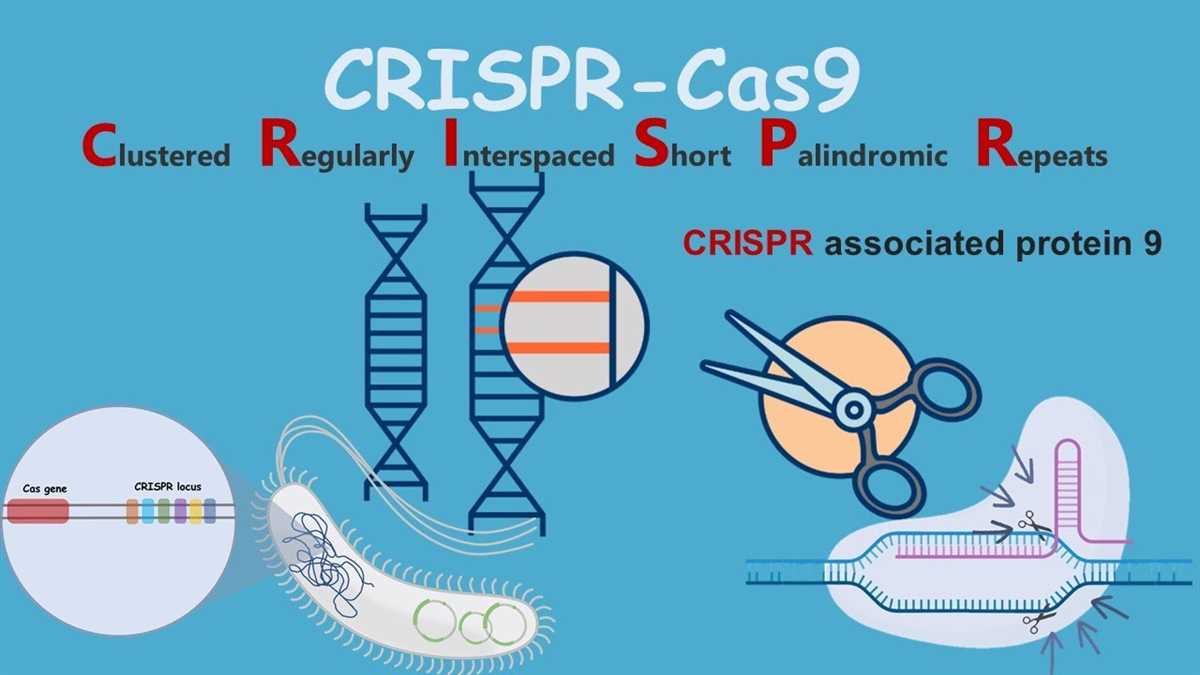
At its core, Crispr-Cas9 is a complex system that consists of two main components: the Crispr RNA (crRNA) and the Cas9 enzyme. The crRNA is a small RNA molecule that contains a sequence that is complementary to the target DNA sequence, while the Cas9 enzyme acts as a molecular scissors that can cut the DNA at a specific location. The crRNA guides the Cas9 enzyme to the target DNA sequence, where it creates a double-stranded break in the DNA helix. This break can then be repaired by the cell’s own repair mechanisms, leading to either the deletion or addition of specific genetic material.
One of the key advantages of Crispr-Cas9 is its accuracy and specificity. The crRNA can be designed to target virtually any DNA sequence, allowing scientists to precisely edit the genome. This level of control has opened up new possibilities for studying the function of specific genes, as well as developing potential gene therapies. However, it is worth noting that Crispr-Cas9 is still a relatively new technology, and there are still many challenges to overcome, such as off-target effects and ethical concerns. Nevertheless, the potential of Crispr-Cas9 is undeniable, and scientists around the world are actively exploring its possibilities.
Overview of Crispr-Cas9 Technology
The Crispr-Cas9 technology is a revolutionary genetic engineering tool that allows scientists to easily and precisely edit an organism’s DNA. It utilizes an RNA-guided DNA endonuclease called Cas9, which is capable of cutting DNA at a specific location. This Cas9 enzyme is guided by a small RNA molecule, known as the guide RNA (gRNA), that is complementary to the target DNA sequence.
Once the Cas9 enzyme is guided to the target DNA sequence, it creates a double-stranded break at that specific location. This break triggers the cell’s repair machinery to either introduce small insertions or deletions, or to replace the DNA sequence with a new one. By controlling the repair process, scientists can introduce specific genetic changes, such as inserting or removing genes, or even correcting disease-causing mutations.
The Crispr-Cas9 technology has revolutionized the field of genetic engineering due to its simplicity, efficiency, and versatility. Unlike previous methods of genetic manipulation, which required extensive knowledge of the target organism’s genome, the Crispr-Cas9 system can be used in a wide range of organisms with minimal prior information. It has been successfully applied in plant and animal research, as well as in human gene therapy trials.
The potential applications of the Crispr-Cas9 technology are immense. It can be used to study gene function, create disease models, develop new treatments for genetic diseases, and improve crop yield and quality. However, the technology also raises ethical concerns, particularly regarding its use in human germline editing and its potential for unintended off-target effects. As the field continues to evolve, it is important to carefully consider the ethical implications and regulatory frameworks surrounding the use of Crispr-Cas9 technology.
Why Build a Paper Model of Crispr-Cas9?
Building a paper model of Crispr-Cas9 can be an effective way to understand the molecular structure and function of this powerful gene-editing tool. By creating a tangible representation of the Cas9 protein and the guide RNA, students and researchers can visualize how they work together to target and modify specific DNA sequences.
One of the key advantages of a paper model is its simplicity and accessibility. Unlike a real laboratory experiment, which requires specialized equipment and expertise, building a paper model only requires a few basic materials like scissors, glue, and paper templates. This makes it an ideal educational tool for classrooms or for individuals who want to learn about Crispr-Cas9 at home.
By constructing a paper model, students can also gain a deeper understanding of the structural components of Crispr-Cas9. They can see how the Cas9 protein is shaped and how it interacts with the guide RNA to form a complex that can recognize and bind to specific DNA sequences. This hands-on approach helps to reinforce the concept of how the Crispr-Cas9 system works at a molecular level.
Furthermore, building a paper model allows for exploration and experimentation. Students can modify the model to simulate different scenarios, such as changing the target DNA sequence or introducing mutations. This enables them to observe the potential outcomes of using Crispr-Cas9 in different genetic contexts and gain insights into the complexities and limitations of this technology.
Benefits of using a paper model
There are several benefits to using a paper model when learning about complex scientific concepts such as the CRISPR-Cas9 system. First and foremost, a paper model provides a tangible representation of the molecular components and processes involved. It allows students to physically manipulate and interact with the model, which can greatly enhance their understanding and retention of the material. This hands-on approach helps to bridge the gap between theory and practice, making abstract concepts more concrete and accessible.
Another advantage of using a paper model is cost-effectiveness. Paper models are inexpensive to produce compared to their three-dimensional counterparts, such as plastic models or computer simulations. This affordability makes them accessible to a wider range of students and educational settings, ensuring that everyone has the opportunity to learn about complex scientific concepts regardless of financial constraints.
Visual representation
A key benefit of a paper model is its ability to provide a visual representation of the CRISPR-Cas9 system. The model can display the various components of the system, such as the Cas9 protein and the guide RNA, as well as the target DNA sequence. This visual representation allows students to better understand how these components interact with each other and how they contribute to the overall function of the system.
Interactive learning
When using a paper model, students can actively participate in the learning process. They can assemble the model themselves, which requires them to manipulate the pieces and understand their spatial relationships. This hands-on approach promotes active engagement and helps to reinforce their understanding of the CRISPR-Cas9 system.
Accessible and cost-effective
Unlike more complex models or computer simulations, a paper model is relatively inexpensive and easy to produce. This makes it accessible to a wider range of students and educational settings, ensuring that everyone has the opportunity to learn about the CRISPR-Cas9 system. Additionally, paper models can be easily distributed and shared, allowing students to continue their learning outside of the classroom.
In conclusion, using a paper model when learning about the CRISPR-Cas9 system offers several benefits, including providing a visual representation, promoting interactive learning, and being accessible and cost-effective. Incorporating these models into educational settings can greatly enhance students’ understanding and engagement with this complex scientific concept.
Materials and Tools Required
If you are interested in building a paper model of CRISPR-Cas9, there are a few materials and tools that you will need to gather before you begin. These materials and tools will help ensure that you have everything you need to successfully construct your model. Below is a list of the materials and tools required:
Materials:

- Cardstock paper: You will need cardstock paper to print the template for the CRISPR-Cas9 model. Cardstock paper is recommended because it is more durable and sturdy compared to regular printer paper.
- Printer: You will need a printer to print the template for the CRISPR-Cas9 model onto the cardstock paper.
- Scissors: Scissors are essential for cutting out the various parts of the CRISPR-Cas9 model.
- Glue or double-sided tape: You will need glue or double-sided tape to adhere the different parts of the CRISPR-Cas9 model together.
Tools:
- Ruler: A ruler will come in handy for measuring and ensuring precise cuts.
- X-Acto knife: An X-Acto knife can be used for more intricate cuts or for trimming edges.
- Self-healing cutting mat: A self-healing cutting mat is recommended to protect your work surface when using the X-Acto knife.
- Tweezers: Tweezers can be useful for handling small or delicate parts of the CRISPR-Cas9 model.
By gathering these materials and tools, you will have everything you need to start building your own paper model of CRISPR-Cas9. Remember to take your time and follow the instructions carefully to ensure a successful and accurate model.
List of materials and tools needed for building the paper model
Building a paper model of CRISPR-Cas9 requires a few specific materials and tools to ensure accuracy and precision in the construction process. Here is a comprehensive list of what you will need:
Materials:
- Printable templates of CRISPR-Cas9 components
- Heavyweight paper or cardstock
- Scissors or craft knife
- Glue or adhesive tape
- Ruler or straight edge
- Markers or colored pencils
Tools:
- Computer and printer
- Access to the internet for downloading templates
- Cutting mat or protective surface
- Tweezers or small pliers (optional)
Before starting the construction, ensure that you have gathered all the necessary materials and tools to avoid interruptions during the building process. Printing the templates on heavyweight paper or cardstock will provide sturdiness and durability to your model. Scissors or a craft knife will be essential for cutting out the template pieces accurately.
Step-by-Step Instructions
Building a paper model of crispr-cas9 requires following a series of step-by-step instructions. This model is a simplified representation of the CRISPR-Cas9 system used in gene editing. It is a great educational tool for understanding the principles behind this revolutionary technology.
Materials Needed:
- Printed paper model template
- Scissors
- Glue or tape
Step 1: Printing the Template
Start by printing the paper model template provided. Ensure that it is printed on sturdy cardstock or thick paper, as this will make the final model more durable.
Step 2: Cutting Out the Pieces

Using a pair of scissors, carefully cut out each individual piece from the template. Pay close attention to the cutting lines and make sure to cut along them accurately for the best results.
Step 3: Folding the Pieces
Once all the pieces are cut out, use a ruler or any other straight edge to help you make clean and precise folds along the designated fold lines. Crease the folds well to ensure that the model stays in shape once assembled.
Step 4: Assembling the Model
Now it’s time to start assembling the model. Begin by applying glue or tape to the tabs and then carefully attach them to the corresponding surfaces. Follow the instructions provided on the template to know where each piece should be placed.
Step 5: Completing the Model
Continue attaching the pieces and following the instructions until the entire model is completed. Take your time and make sure that all the pieces are securely attached to create a sturdy and accurate representation of the CRISPR-Cas9 system.
By following these step-by-step instructions, you can successfully build a paper model of crispr-cas9. This model will serve as a visual aid to enhance your understanding of the CRISPR-Cas9 gene editing technology.
Detailed guide for building the paper model of Crispr-Cas9
Building a paper model of Crispr-Cas9 is a great way to understand the structure and function of this powerful gene-editing tool. By following these step-by-step instructions, you can create a detailed model that showcases the different components of Crispr-Cas9 and how they work together.
Materials:
- Printable template of the Crispr-Cas9 model
- Scissors
- Glue or tape
- Coloring materials (optional)
Instructions:

- Print out the template of the Crispr-Cas9 model on a sheet of paper.
- Carefully cut out each component of the model along the solid lines.
- If desired, color each component using coloring materials to enhance the visual representation.
- Begin assembling the model by folding along the dotted lines of the DNA strand to create a double helix structure.
- Attach the DNA strand to the paper base using glue or tape.
- Construct the Crispr RNA (crRNA) by folding and attaching the corresponding pieces according to the template.
- Attach the crRNA to the DNA strand, aligning the guide sequence with the target sequence on the DNA.
- Build the Cas9 protein by folding and attaching the different components, including the RuvC and HNH domains.
- Attach the Cas9 protein to the DNA strand, ensuring that the RuvC and HNH domains are positioned to cleave the DNA.
- Complete the model by attaching the PAM (Protospacer Adjacent Motif) sequence to the DNA strand, which is the recognition site for Cas9.
Note: For a more interactive experience, you can use a small piece of cardboard as a base and glue the different components onto it, creating a three-dimensional model.
Summary
Building a paper model of Crispr-Cas9 allows for a hands-on exploration of its structure and function. This detailed guide provides step-by-step instructions for constructing the model, from creating the DNA double helix to attaching the crRNA, Cas9 protein, and PAM sequence. By following these instructions, you can gain a better understanding of how Crispr-Cas9 works and its potential applications in genetic engineering and disease research.